The Coming World of 3D Printing

3dcubeWithin a decade or two, 3D printers may do for physical objects what digitization did for books, movies, and music.  Another phase of the revolution is coming, with the digital world moving more into the physical.  Along one front there’s the Internet of Things, as physical objects become “smart” and linked to the Internet.  At the other front there’s digital home printing of physical 3D objects, from jewelry to replacement parts, and even candy sculptures.

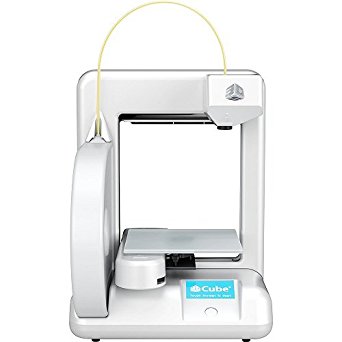
3D printers are starting to get some mainstream media attention, including an appearance on the Colbert Report and a recent ABC News article. Like computers before them, they’ve already broken out of the business world and are moving into the consumer market.  I’d say we’re now moving past the early Altair phase and about to enter the Apple II explosion.  MakerBot is on their 3rd generation with their new Replicator.  Meanwhile the competition for the home market is heating up, with competitors like the Cube and the larger, but still rather pricey 3D Touch.  Meanwhile the iModela takes a different approach.  It’s a desktop CNC milling machine rather than an additive printer.   Except for the 3D Touch, the prices aren’t that far away from the $1298 that the original Apple II would have set you back when it was introduced, WITHOUT adjusting for inflation.

Make no mistake, this won’t be a passing fad.  Like a lot of technology, it may take a bit longer to get established than the hype would suggest, but its going to happen.  Stories are often a much better way to make a point than facts and figures, and thanks to Cory Doctorow’s ability to write and willingness to release his material under a Creative Commons license, there’s a great 1-page story on the disruption these things are going to cause (there’s also an audio version):

Printcrime by Cory Doctorow

(Originally published in Nature Magazine, January 2006)

The coppers smashed my father’s printer when I was eight. I remember the hot, cling-film-in-a-microwave smell of it, and Da’s look of ferocious concentration as he filled it with fresh goop, and the warm, fresh-baked feel of the objects that came out of it.

The coppers came through the door with truncheons swinging, one of them reciting the terms of the warrant through a bullhorn. One of Da’s customers had shopped him. The ipolice paid in high-grade pharmaceuticals — performance enhancers, memory supplements, metabolic boosters. The kind of thing that cost a fortune over the counter; the kind of thing you could print at home, if you didn’t mind the risk of having your kitchen filled with a sudden crush of big, beefy bodies, hard truncheons whistling through the air, smashing anyone and anything that got in the way.

They destroyed grandma’s trunk, the one she’d brought from the old country. They smashed our little refrigerator and the purifier unit over the window. My tweetybird escaped death by hiding in a corner of his cage as a big, booted foot crushed most of it into a sad tangle of printer-wire.

Da. What they did to him. When he was done, he looked like he’d been brawling with an entire rugby side. They brought him out the door and let the newsies get a good look at him as they tossed him in the car, while a spokesman told the world that my Da’s organized-crime bootlegging operation had been responsible for at least twenty million in contraband, and that my Da, the desperate villain, had resisted arrest.

I saw it all from my phone, in the remains of the sitting room, watching it on the screen and wondering how, just *how* anyone could look at our little flat and our terrible, manky estate and mistake it for the home of an organized crime kingpin. They took the printer away, of course, and displayed it like a trophy for the newsies. Its little shrine in the kitchenette seemed horribly empty. When I roused myself and picked up the flat and rescued my peeping poor tweetybird, I put a blender there. It was made out of printed parts, so it would only last a month before I’d need to print new bearings and other moving parts. Back then, I could take apart and reassemble anything that could be printed.

By the time I turned eighteen, they were ready to let Da out of prison. I’d visited him three times — on my tenth birthday, on his fiftieth, and when Ma died. It had been two years since I’d last seen him and he was in bad shape. A prison fight had left him with a limp, and he looked over his shoulder so often it was like he had a tic. I was embarrassed when the minicab dropped us off in front of the estate, and tried to keep my distance from this ruined, limping skeleton as we went inside and up the stairs.

“Lanie,” he said, as he sat me down. “You’re a smart girl, I know that. Trig. You wouldn’t know where your old Da could get a printer and some goop?”

I squeezed my hands into fists so tight my fingernails cut into my palms. I closed my eyes. “You’ve been in prison for ten years, Da. Ten. Years. You’re going to risk another ten years to print out more blenders and pharma, more laptops and designer hats?”

He grinned. “I’m not stupid, Lanie. I’ve learned my lesson. There’s no hat or laptop that’s worth going to jail for. I’m not going to print none of that rubbish, never again.” He had a cup of tea, and he drank it now like it was whisky, a sip and then a long, satisfied exhalation. He closed his eyes and leaned back in his chair.

“Come here, Lanie, let me whisper in your ear. Let me tell you the thing that I decided while I spent ten years in lockup. Come here and listen to your stupid Da.”

I felt a guilty pang about ticking him off. He was off his rocker, that much was clear. God knew what he went through in prison. “What, Da?” I said, leaning in close.

“Lanie, I’m going to print more printers. Lots more printers. One for everyone. That’s worth going to jail for. That’s worth anything.”

Creative Commons License Deed

Attribution-NonCommercial-ShareAlike 2.5

You are free:

* to Share — to copy, distribute, display, and perform the work
* to Remix — to make derivative works

Under the following conditions:

* Attribution. You must attribute the work in the manner specified by the author or licensor.

* Noncommercial. You may not use this work for commercial purposes.

* Share Alike. If you alter, transform, or build upon this work, you may distribute the resulting work only under a license identical to this one.

* For any reuse or distribution, you must make clear to others the license terms of this work.

* Any of these conditions can be waived if you get permission from the copyright holder.

Disclaimer: Your fair use and other rights are in no way affected by the above.

This is a human-readable summary of the Legal Code (the full license)

Links to Information on converting R/C cars to autonomous vehicles

My first robot, MARV-1, uses a small, commercial tracked chassis.  It uses dead reckoning from wheel encoders (only) for navigation, and a single front-mounted ultrasonic sensor for obstacle avoidance.  While I could get fancier on sensors and tweak the control more (e.g., add proportional feedback between the wheel encoders and the motor PWM control to keep on course better), I figure I’m nearing the end of the development and testing I want to do on this first robot.

For MARV-2, my second robot,  I want to build a new vehicle with GPS and other sensor systems suitable for outdoor navigation, and I want something that covers ground more quickly.  I figure an R/C conversion will fit the bill.  I’ve started looking into this, and it seems that it’s not too difficult.  It also seems that it’s easier on a “hobby” class R/C vehicle than a cheap toy one.  Many hobby class cars, it seems (from my online research) utilize standard 3-wire servo connections, sometimes with an electronic controller between the R/C unit and the drive and steering controls.  Cheaper toy cars have a circuit board you need to cut wires from and solder new connections on.

AVC 2010 Poster

Poster for Sparkfun’s 2010 AVC competition

Sparkfun Electronics runs an annual Autonomous Vehicle Competition, and several competitors from past years have blogs with useful information for developing autonomous vehicles from R/C cars.  Three blog postings that seem to provide a lot of good information are Overdue AVC Specifications, Team Zyzzyx” SparkFun AVC 2011 Ground Entry, and Data Bus: the Nickel Tour.

The video podcast The Latest in Hobby Robotics has several videos on modifying R/C cars.  The two I’ve found that are most relevant are The Latest in Hobby Robotics 17, which focuses on modifying higher end cars and The Latest in Hobby Robotics 18, which demonstrates modding a cheaper toy-style R/C car.

An additional link that’s worth pointing out, especially if you’re modifying a toy R/C car, is Autonomous R/C Car – Part 1 – Reverse Engineering Signals.

I suspect it will be a while before I wrap up work on MARV-1 and have the time to start MARV-2, but the information these other hobbyists provide a lot of good guidance for getting started.

An Introduction and Example of Finite State Machines

Finite State Machines (FSM) are often an excellent design pattern for robot control software. As I was developing my first robotic vehicle, I started with just modifying and expanding upon some sample code I found online.  This worked for a robot moving around at random, avoiding obstacles.  But once I wanted to add positioning and navigation, it became difficult to keep track of where the logic should be at each step and each time the main control loop executed.  I realized that a state machine approach was the solution, and it’s worked out beautifully.

What is a Finite State Machine?  You can find the formal definition here at Wikipedia, but as David Stonier-Gibson puts it in his tutorial:

The formal, mathematical definition of an FSM is such brain numbing, eye popping mumbo jumbo I feel certain that 9 out of 10 electronic engineering and IT students switch off in the first 5 minutes of the FSM lecture series, never to ever benefit from the power of FSMs in their work. This is not difficult stuff, it’s just made to look difficult by the academics!

The basic concept of an FSM is that the system is, at any time, in a specific, pre-defined state.  Multiple states are defined, along with the internal or external events that cause the system to transition from one state to another.  The functions that need to be performed for each transition from one state to another are then determined, and, of course, you have functions to be performed when in a given state.  Not all events trigger a state transition, some are processed and handled with the system staying in the same state.  It’s easiest to explain by example.  A good, short tutorial with examples can be found in the online article Application Design Patterns: State Machines, along with some useful design hints.  Below, I use the state-machine model I developed for my MARV-1 autonomous dead-reckoning vehicle as an example.

State Machines can be represented in several ways.  One approach is a state transition matrix.  Below is the matrix for the code for my MARV-1 autonomous vehicle:

State Transition Matrix

The topmost row shows the seven states that the robot can be in.  The leftmost column shows the internal and external events that can cause a change from one state to another.  For example, “Button 1 pressed” is an external event.  If MARV-1 is currently in the Off state, it transitions to the Orienting state.  If it’s in any other state, it transitions to Off.  “Completed calculating next heading” would be an internal event that causes a transition from the Orienting state to the Turning state.  If, instead, the last waypoint in the list had already been processed, then there would be a transition from the Orienting to the Off state.

In C/C++/Arduino code, states are typically coded using the Switch command.  Each Case ends with a break;, since the system can only be in one state at a time.  There can be code to run each time a state is entered for the first time and code to run when you exit a particular state.  This code can be dependent on the specific transition, e.g., the exit code from Orienting to Off is different than from Orienting to Turning.  I found it easier to use exit code rather than entrance code wherever possible, because then I didn’t have to set a flag and check each time through the main loop to determined if I was entering a state for the first time or not.

In fact, 95 percent of the code in the main Loop for my MARV-1 vehicle is inside a single Switch statement.  The exceptions are checking for the Button 1 press, since that must be done in every state, and updating position and orientation, since, with the exception of the Off state, that must always be done.

You’ll notice that most of the cells in the state transition matrix are empty.  That’s because most events only affect one or two states.  That means that you don’t need to check for those events when in any of the other states.   The state machine design pattern makes coding simpler and much, much easier to follow.  It also  allows you to change out the details within a state (inside a specific case in your code) without affecting the rest of your code.  The exception to this is the transition triggers themselves and the exit processing code.

Another way of designing or documenting your Finite State Machine is with a state machine diagram.  Here’s the same information for MARV-1, presented in pictorial form:

State Machine Diagram

In the case of MARV-1, I started my planning figuring on an Off state and an On state.  Of course, the On state quickly was subdivided into more.  Since MARV-1 uses tank-style turns and always either moves in a straight line or turns in place, it was logical to have a Turning state and a Traveling state.  As I worked on the code, I found it made sense to break out the Orienting from the Turning, even though the Orienting is just some calculations that complete in a single pass through the main Loop.  Similarly, it became easier to code to break the obstacle avoidance maneuvering into 3 states, one for each step in the 3 step obstacle avoidance approach I decided on:  Back up, turn right, go forward a ways, hopefully clearing the original obstacle.  As you can see from the table or picture, if MARV-1 is still pointing towards an obstacle after turning, it goes back to the Avoid:Backing state, as it does if it detects an obstacle while moving forward.

Finite State Machines are a simple and effective concept for robot software, and I encourage you to plan out your next project using this approach.