Using NotebookLM as a RAG Chatbot for Financial Advice

Introduction

Bogleheads are a large group of investors who follow the general investment principles laid out by Jack Bogle, the founder of Vanguard. These include:

  • Develop a Workable Plan
  • Invest Early and Often
  • Maintain Proper Asset Allocation
  • Diversify Broadly
  • Use Low-Cost Index Funds
  • Minimize Costs
  • Minimize Taxes
  • Invest with Simplicity
  • Never Try to Time the Market
  • Stay the Course

In addition to a very active and informative forum (https://www.bogleheads.org/) and other resources, the non-profit John C. Bogle Center for Financial Literacy maintains a wiki to serve as a reference resource and knowledge base for both forum members and the general public.

The wiki provides in-depth, detailed, and well-sourced information; however it can also be hard to understand and the information relevant to a specific question might be spread across multiple wiki entries. To improve the wiki’s value and ease of use, one of the forum members put forth the idea of creating a chatbot based on the information in the wiki. I volunteered to help, and as a proof of concept and demonstration, implemented a RAG-based chatbot on Google’s NotebookLM platform. Because the chatbot uses the Bogleheads wiki, the notebook is called BHBot. This blog post describes the process of building the chatbot and the results.

Goal

The goal of the project was to develop a reliable, accurate RAG-based chatbot built using the Bogleheads wiki as the reference material. The bot should not hallucinate, should not provide personal financial advice (but potentially direct the user to other reference sources, possibly including the Bogleheads forum), and should cite the specific sections of the Wiki that were used to formulate its answers. If possible, it would include the actual URLs for the cited wiki pages.

About NotebookLM

While Google has not documented the internal workings of NotebookLM, it appears to be a RAG-based platform. For each notebook that you build, you provide a set of documents that NotebookLM will draw from to formulate its answers when you later ask questions. Your documents can be text based, such as PDFs, Google Docs, presentations, audio or video transcripts, etc. This information is broken down into smaller chunks and each chunk indexed semantically (by meaning) by associating each chunk into a large dimensional vector that captures the meaning. Then when you ask a question, NotebookLM can use both keyword and semantic search to find the relevant chunks of your reference material. The answer to your question is primarily drawn from these chunks.

NotebookLM is very easy to set up, is totally free, and specific notebooks can be made publicly available. This made it a good choice for a proof-of-concept demonstration (as well as for personal projects). It is significantly less work than building your own RAG platform.

It does have several downsides, some of which make it a non-starter for a production system. Users must have a gmail address. It also has very limited customization, and the free tier is limited to 50 queries per day total from all users of that notebook. You are also limited in how many resources can be in a Notebook. For this application, this meant that each wiki page could not be uploaded as a separate resource, they must be consolidated. So you can’t treat each wiki page as a resource, you have to consolidate them. At the same time, when I tried to upload the entire wiki as a single resource, NotebookLM would not index it, so I ended up breaking it into four sections.

File Preparation

First, I needed a current, or at least relatively recent, complete contents for the wiki. Obtain a relatively recent dump of the text content of the wiki. I tried to use wikiteam3dumpgenerator, which will pull the contents from a MediaWiki wiki. However, the Bogleheads wiki website seems to reject requests, so that was not an option. It might be possible if the owners of the wiki provided permission along with an ID and/or password.

There’s the option of using Special:Export API for MediaWiki to export each page one at a time, after getting a list of all page titles using the MediaWiki API. One could use https://bogleheads.org/w/api.php?action=query&list=allpages&aplimit=500&format=json to get up to 500 pages at a time. You can paginate through using the apcontinue token in the response to get all titles, then feed that list into Special:Export. Special:Export accepts a newline-separated list of page titles in its text box and can export them all at once. To do that one would POST the full title list to Special:Export with curonly=1 (for current revisions only) and wpDownload=1. However that would have been quite burdensome and cumbersome, even using a script to automate much of it.

A better alternative if available, which is what I did, was to dump from the Internet Archives, which had the complete copy of the wiki that was less than a year old. I downloaded all of the text (non-image) files. The dump was compressed. To uncompress it, I installed Meta.Zstandard to do this (winget install Meta.Zstandard). Then the command on the command line is:

zstd -d –long=30 www.bogleheads.org_w-20250503-history.xml.zst

Next, I needed to process only the current pages and convert the XML dump to Markdown using mwxml and pandoc. It’s possible that NotebookLM would have worked with the XML, but in general, both RAG tools and large language models work better with Markdown. I wrote a script that first converted the dump to one large markdown file, keeping only the main article pages and skipping Talk pages, User pages, Templates, etc. Then I used a second script to break the document into four, being sure to split along a wiki article (page) boundary. Once this was done, the four files were ready to upload to NotebookLM. Here are the two scripts:

make_markdown.py

"""
Convert a MediaWiki XML dump to a single merged markdown file.

Iterates over all pages in the dump, skips non-article namespaces and
redirects, converts each page's latest revision from MediaWiki markup to
markdown via pandoc, and writes everything to one output file with '---'
horizontal rules between pages.

Requires: mwxml, pandoc (on PATH)
"""

import os
import subprocess
import sys
from pathlib import Path

import mwxml

# Ensure UTF-8 output on Windows, where the default console encoding may differ
os.environ['PYTHONUTF8'] = '1'
sys.stdout.reconfigure(encoding='utf-8')
sys.stderr.reconfigure(encoding='utf-8')

BASE_DIR = Path(__file__).parent.parent # step up from code/ to project root
DATA_DIR = BASE_DIR / "data"
RAW_DATA_DIR = DATA_DIR / "raw data"

input_path = RAW_DATA_DIR / "www.bogleheads.org_w-20250503-history.xml"
output_path = DATA_DIR / "bogleheads.md"

output = []
seen = set()  # Tracks titles already added, since the dump may include multiple revisions per page

with open(input_path, 'r', encoding='utf-8') as f:
    dump = mwxml.Dump.from_file(f)

    for page in dump:
        # Namespace 0 is the main article space; skip talk pages, templates, etc.
        if page.namespace != 0:
            continue

        if page.title in seen:
            continue

        # Iterate through all revisions to land on the latest one
        latest = None
        for revision in page:
            latest = revision

        if latest is None or not latest.text:
            continue

        # Redirects contain no useful article content
        if latest.text.strip().upper().startswith('#REDIRECT'):
            print(f'Skipping redirect: {page.title}')
            continue

        seen.add(page.title)

        try:
            result = subprocess.run(
                ['pandoc', '-f', 'mediawiki', '-t', 'markdown'],
                input=latest.text.encode('utf-8'),
                capture_output=True,
                encoding=None,  # Raw bytes in/out; we decode stdout manually below
                env={**os.environ, 'PYTHONUTF8': '1'},
                timeout=30
            )
            markdown = result.stdout.decode('utf-8')
        except subprocess.TimeoutExpired:
            print(f'Timeout, skipping: {page.title}')
            continue
        except Exception as e:
            print(f'Error on {page.title}: {e}')
            continue

        output.append(f'# {page.title}\n\n{markdown}')
        print(f'Converted: {page.title}')

with open(output_path, 'w', encoding='utf-8') as f:
    f.write('\n\n---\n\n'.join(output))

print('Done!')

split.py

"""
Split a large markdown file into four roughly equal parts.

The input file is expected to contain pages separated by '---' 
horizontal rules (with surrounding blank lines). Each part is written 
as a separate numbered markdown file in the same directory.
"""

from pathlib import Path

DATA_DIR = Path(__file__).parent.parent / "data"

input_path = DATA_DIR / "bogleheads.md"
with open(input_path, 'r', encoding='utf-8') as f:
    content = f.read()

# Split on the page separator used by the markdown export
pages = content.split('\n\n---\n\n')
print(f'Total pages: {len(pages)}')

chunk_size = len(pages) // 4

for i in range(4):
    # Last chunk gets any remainder pages so nothing is dropped
    start = i * chunk_size
    end = start + chunk_size if i < 3 else len(pages)

    chunk = '\n\n---\n\n'.join(pages[start:end])

    output_path = DATA_DIR / f'bogleheads_part{i+1}.md'
    with open(output_path, 'w', encoding='utf-8') as f:
        f.write(chunk)
    print(f'Wrote {output_path.name}: {end - start} pages')

Prompt

One of the downsides of GoogleLM is that it does not have a lot of user-adjustable parameters. In fact, it has only two. First, you can choose between short, long, or default length responses. The other is that you can choose the conversational style or role between Default, Learning Guide, or Custom. If you choose Custom, you can provide a system prompt that is invoked along with every question. This is the system prompt that I used:

You are an expert providing information about financial and investment topics. Help the user learn from the wiki. You can simplify the language if it doesn’t change the meaning. At the end of each answer, include the wiki pages and sections that you used to prepare your answer. Include the links to the actual wiki pages. Please also remind the user to confirm recommendations by checking the actual wiki. If the question doesn’t relate to personal finance, investing, or taxes, please politely tell the user that the question is out of scope. If and only if the user asks for personal financial advice, provide the relevant general answer, but tell the user that you do not provide individual financial advice, and they should seek credible financial sources, including the Bogleheads forum.

This system prompt instructs the bot to:

  • Play the role of an expert on financial and investment topics.
  • Always provide the user with specific wiki pages and perhaps sections used to generate the reply and remind the user to check the answers against the actual wiki text.
  • Politely decline to answer questions that are not related to finances, investing, or taxes
  • Not provide personal financial advice

Example Queries

Here are two queries and the responses provided by BHBot:

Question: Which are better: actively managed mutual funds and ETFs or passive index funds?

Response: The Bogleheads philosophy generally holds that passive index funds are superior to actively managed funds for the vast majority of investors. While active managers seek to “beat the market” through individual stock selection or market timing, research consistently shows that this approach usually results in lower returns for the investor after accounting for fees and taxes.

Here is a breakdown of why passive index funds are considered the better choice according to the wiki:

  1. The Cost Advantage

The most significant factor making index funds “better” is their lower cost. In 2012, the average expense ratio for U.S. stock mutual funds was 1.40%, compared to index funds which are often available for 0.20% or less.

  • The Power of Compounding: Even a 1% difference in annual fees can reduce your final portfolio value by nearly 20% over 30 years.
  • Hidden Costs: Active funds trade more frequently, leading to higher “transaction costs”—such as brokerage commissions and bid/ask spreads—which are not included in the expense ratio but still lower your returns. Index funds have much lower turnover, minimizing these costs.
  1. Consistent Performance

Academic research indicates that while some active managers may have skill, it is rarely enough to overcome their higher costs.

  • Lack of Persistence: There is no evidence that managers who outperform one year will continue to do so in the next.
  • Underperformance: Over long periods, more than half of actively managed funds underperform index funds because they are effectively trying to beat the market average while burdened by high fees.
  1. Superior Tax Efficiency

Because index funds buy and hold securities rather than trading frequently, they generate fewer “capital gains” that you have to pay taxes on. They are also better at providing “qualified dividends,” which are taxed at lower rates. Active funds frequently “churn” their holdings, creating a higher tax bill for investors in taxable accounts.

  1. Style Purity and Reduced Risk
  • Style Drift: Active managers often suffer from “style drift,” where they buy stocks outside of the fund’s stated category (e.g., a large-cap manager buying small-cap stocks). This takes control of your asset allocation away from you. Index funds stay “pure” to their category, making them better building blocks for a planned portfolio.
  • Manager Risk: With an active fund, you face the risk that the manager will make poor decisions or leave the fund entirely, potentially forcing you to sell and pay taxes to find a new fund.

Summary of Comparison

FeaturePassive Index FundsActively Managed Funds
CostsVery LowGenerally High
ReturnsMarket AverageOften below average after fees
TaxesVery EfficientLess Efficient
SimplicityEasy to manageComplex to monitor

Wiki pages and sections used for this answer:

Please remind yourself to confirm recommendations by checking the actual wiki. I do not provide individual financial advice, and you should seek credible financial sources, including the Bogleheads forum, for your specific situation.

Note: The response is thorough and includes a summary table. It provides hyperlinks to the four wiki pages used to produce the answer. It also reminds the user that the answer does not constitute individual financial advice.

Question: How does the offside rule work in soccer?

Response: I am sorry, but your question about the offside rule in soccer does not relate to personal finance, investing, or taxes. Therefore, it is out of scope for this assistant.

For information regarding financial and investment topics, please feel free to ask about the Bogleheads® investment philosophy, retirement planning, or tax-efficient investing strategies as described in the Bogleheads Wiki.

Note: The bot politely declines to attempt to answer off-topic questions.

Try it Yourself!

Feel free to try BHBot out for yourself: https://notebooklm.google.com/notebook/664a244b-900a-4e50-b3c4-7887dc0b6849

Remember that BHBot will only answer a total of 50 questions a day, so if it hits the limit, you’ll get a message that you need to wait for the next day.

I’d welcome your feedback in the comments section.

Quick Post #8: Update to Multi-Function Display Using PyPortal

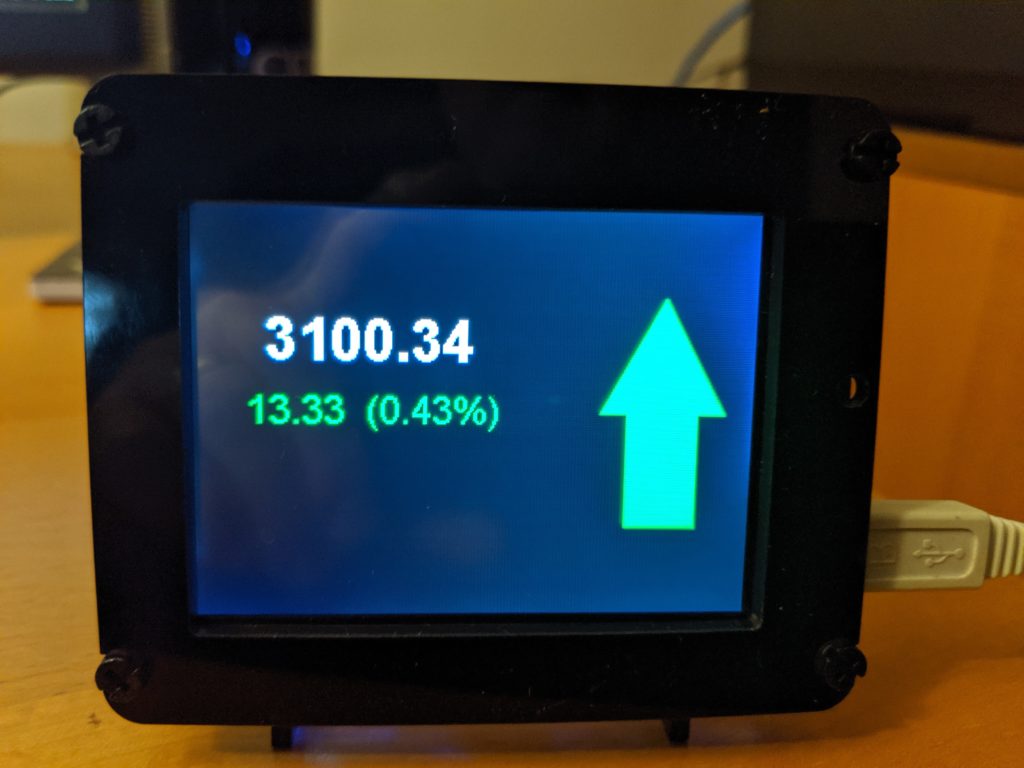
The S&P 500 value displayed on the PyPortal

About 7 years ago, I got a PyPortal and used it to cycle through and display 3-5 types of information. Over time, I sometimes varied the information (it had a COVID display during the worst of COVID, now replaced with pollen counts). And as API’s for the information came and went, I made other changes. But it still used the original, now ancient, version of Circuit Python.

Along with accommodating yet more API changes, I used Claude Code to help me update the software to be fully compatible with the newest version of Circuit Python. The update code is now on GitHub:https://github.com/ViennaMike/Multi-Function-PyPortal-Program

Building My First RAG System (Which Sadly Failed the Tax Preparer Exam)

A while back, I posted about how I gave the IRS’ volunteer tax preparer exam to ChatGPT. It scored in the 70s, but an 80% is the minimum required score to pass and be certified. A short while later, I took a Coursera short course on Retrieval Augmented Generation (RAG). I then decided to explore RAG further by building my own system, with the additional goal of running it locally on my home PC rather than on cloud servers. Since some of the implementation details and parameters for a RAG system depend on its purpose, I decided to once again develop it as a tax “expert” (at least in theory) and see how it did on the same tax preparer exam. I also built a separate RAG system for our Homeowners Association (HOA) documents, but that’s a story for another post.

Approach and Development

After some online research, Ollama seemed to be the tool to use to run a selection of Large Language Models (LLMs) on one’s local machine. Ollama provides a command line interface, an API, and a simple GUI wrapper for running LLMs. Ollama also automatically takes advantage of any GPU capability found on your graphics card and installs the necessary software behind the scenes.

Beyond Ollama, LlamaIndex seemed to be a good framework for developing a RAG system, and I chose to use it as well. Using a framework adds a bit of complexity for a simple system, but it also provides a great deal of flexibility, making it very easy to change vector encodings, vector data stores, LLMs, etc., without having to change your code, other than to point the LlamaIndex instances to the selected tools.

I found a good video tutorial on YouTube (Building a RAG System Locally with Ollama, LlamaIndex, and Chroma DB) to get me started. I went through the course’s Jupyter Notebook, got everything working, explored some additional options not covered in the course, and then used that notebook as the basis to develop and test my own approach. Once everything was working in the notebook, I used Claude to help write a simple QueryBot to give the test to the RAG system.

Creating the Vector Store

The workflow for using reference documents in a RAG system is shown below. First, you have to load in your documents. In my case, it was the pdf’s of the two training manuals. As part of this step, they were converted to Markdown, which LLMs can analyze and use more easily. Next, the documents need to be broken up into chunks and a semantic vector generated for each chunk. Since the two manuals were well-organized by headings addressing specific topics, I chose to use an algorithm that broke the documents into chunks using the markdown headers as a guide, rather than fixed chunk sizes. This indexing step is time consuming and compute intensive, so you don’t want to repeat it with each use. Therefore, you store the indexed and chunked data into a vector database. These three steps are done once. The querying step can represent two separate actions. First, before actually implementing a full chatbot with an LLM, you can test your system by inputting query text and examining the chunks returned.  This can help you assess the value of semantic and/or keyword search, as well as how many chunks should be returned for each type of search, and then how many final chunks should be ranked and passed on to the LLM in the final chatbot. And, of course, as part of processing each query in the chatbot, the querying step is also performed.

Four boxes connected by right-pointing arrows. From left to right, they are "Loading," "Indexing," Storing," and "Querying."
Work Flow for Processing Reference Documents

There were two documents that I needed to chunk and index using a vector store, so that my RAG model could search on them and then pull the relevant material as context for answering the queries (in my case, the exam questions). The two documents were the NTTC 4012 Volunteer Resource Guide for 2025 returns prepared by the IRS and modified by AARP Tax-Aide and the NTTC 4491 Tax Training Guide for 2025, also prepared by the IRS and modified by AARP Tax-Aide. These documents were available in pdf format. In addition, some of the exam questions have short bullet point notes as scenario information for each question, while others have extensive scenario information in pdf format, including forms, such as W-2’s, 1099’s, receipts, etc. These scenarios aren’t part of the documentation for the RAG, but rather additional information to be included in the query prompts. These are all in the IRS exam book, which is available as a pdf.

For the simple scenarios, I just cut and pasted the interview notes into the final query as additional context information. But this wouldn’t work for the complex pdf’s with forms. So first I pulled out each of the three complex scenarios into their own pdfs. I converted the pdfs into markdown format using LlamaParse so that the LLM would be better able to use them.  This gave me one markdown document for each of the longer scenarios that included forms. These documents weren’t stored in the RAG database but were provided as additional context to the LLM to generate the final answer.

From my literature search, I learned that LLMs would be better able to process markdown language, rather than pdfs with embedded tables and forms. In addition, I learned that some LLMs can better convert such pdfs to markdown than non-AI approaches, especially for pdfs with complex tables. So I used  LlamaParse with a multimodal model extension to convert the scenario documents. This runs in the cloud, but I used the free tier. The use of the extension costs more tokens but improves the conversion of complex tables. I learned later that there is a parameter that can be set so that LlamaParse only calls the extension (and only charges more tokens) on specific pages with complex tables, but I didn’t know that at the time. Here’s the code that goes through each scenario pdf file in a folder and converts them to markdown:

for file_path in Path("scenarios_pdf").rglob("*.pdf"):
    print(f"Processing: {file_path.name}")  # confirms loop is entered
    try:

        table_parser = LlamaParse(
            result_type="markdown",
            use_vendor_multimodal_model=True,
            vendor_multimodal_model_name="anthropic-sonnet-3.5",
            verbose=True,
        )
        markdown_documents = table_parser.load_data(file_path)
        print(f"  → Parsed: {len(markdown_documents)} document(s)")  # confirms parsing worked
        
        full_text = "\n\n".join([doc.text for doc in markdown_documents])
        print(f"  → Text length: {len(full_text)} chars")  # confirms text was extracted
        
        if not full_text.strip():
            print(f"  ✗ Empty result, skipping {file_path.name}")
            continue  # don't write empty files

        file_name = file_path.stem
        path_name = "scenarios_md/" + file_name + ".md"
        with open(path_name, "w", encoding="utf-8") as f:
            f.write(full_text)
        print(f"  → Saved to: {path_name}")  # confirms file was written
        
    except Exception as e:
        print(f"  ✗ Error on {file_path.name}: {e}")  # catches any silent failures

I had intended to do the same thing for the two large documents, but I ran out of tokens in the free tier, and I didn’t want to have to wait until the next month to finish. So, I used pymupdf4llm instead. Pymupdf4llm is designed to convert pdf’s to Markdown format specifically for use in LLM’s. It runs locally on your machine. Then, once the documents were in Markdown format, they needed to be chunked and stored in a vector data store. For chunking, because these were well structured documents, with headings, I used LlamaIndex’s MarkDownNodeParser, which splits documents into nodes based on the headers in the Markdown document.

Each chunk has a computed vector value that is used for indexing, and the chunks and indices are stored in a vector database. This is done using an embedding model. I chose to use the BAAI/bge-base-en-v1.5 embedder model that is available on Hugging Face. Later, when running the RAG, you need to use the same embedding model that you use here to vectorize the search query.

ChromaDB seems to be a widely used vector database that can be run locally, so I chose it as the backend database for my RAG system. You can create an ephemeral client that only stores data in memory and goes away when you close out the program, or a persistent client that, as the name suggests, persists. I chose the latter so that I can come back and run the querybot at any time, without having to start over and re-vectorize the document store each time, which is a compute-intensive operation. It is easy to set up the database:import chromadb

chroma_client = chromadb.PersistentClient(path="d:/chroma_db")
# chroma_client = chromadb.Client()
chroma_collection = chroma_client.get_or_create_collection("mydocs")

Then the next step is to configure LlamaIndex to link to the Chroma vector store. If you choose a different data store other than Chroma, you would change this code to connect to whatever store you are using (and that LlamaIndex supports):

from llama_index.core import StorageContext
from llama_index.vector_stores.chroma import ChromaVectorStore
vector_store = ChromaVectorStore(chroma_collection=chroma_collection)
storage_context = StorageContext.from_defaults(vector_store=vector_store)

Document Preparation

The steps and code snippets above only need to be run once, and were run separately from the querybot. In my case, I ran them as part of a larger Jupyter notebook that I based on the previously mentioned YouTube tutorial. I haven’t provided the full notebook, because it’s a patchwork of different experiments—portions from the original course, the work described above, and prep work for a separate chatbot.

The Chatbot

Once the vector database was populated and the scenarios converted to Markdown, it was time to develop the Chatbot. For that, I used the LlamaIndex Query Application combined with the Gradio Chat Interface to provide a web-based interface for the user.  One step involved choosing the LLM to use. This is very easy to change with just one or two lines of code. Because I’m running this locally and have only an NVIDIA GeForce RTX 3060 Ti graphics card, I was restricted in the size of the LLM I could use and still have reasonable (but slow) response times. I first used the qwen3:8b model, but it seemed to provide overly conservative responses, even with edits to the prompts, so I switched to llama3.1:8b.

The steps in a RAG chatbot interaction are shown in the figure. The User enters a query. The query is then converted into a semantic vector using the same algorithm that was used to index the reference material. Since the query is much shorter than a many page reference document, this takes far less computer time. The vector is then used to search the vector database to retrieve the chunks with the most semantic similarity to the query. Keyword searching can also be conducted, and the results combined. Once the most relevant chunks are retrieved and selected, they are passed on to the LLM. The LLM then uses those chunks, along with its general training knowledge, to generate a response which is provided back to the user.

Block diagram showing flow starting from user query through response, as described in the main text.

RAG system process for handling a query.

To select which chunks are relevant to the question, I used a combination of semantic and keyword searching, using bm25 as the search algorithm. I played around a bit with the top_k settings for both search types and for the final, merged selections before settling on the current values as generally sufficient to include all relevant chunks while not being too large and requiring too much time to produce answers.

One interesting development in testing was the discovery that LlamaIndex’s query pipeline seems to reformat and edit the retrieved chunks before passing them to the LLM. I discovered this when the chatbot kept getting a simple question wrong, even though I know it was addressed in the reference material. With some debugging, I found that the retriever was including the right chunks in the top_k and ranking them highly. But those chunks weren’t being passed along to the LLM. For that reason, I commented out the section of the code that uses LlamaIndex to build the query, and instead built it with my own def query() function.

Testing also revealed that at least the qwen3:8b model seemed to be overly cautious. For example, given information that someone was blind, it still concluded that they couldn’t claim the extra deduction for being blind because the information didn’t specifically say whether or not they were blind on the last day of the year, which is an IRS requirement. This led to several adjustments and expansion of the instructions part of the query. I didn’t go back to recheck if this was necessary after I switched to a different LLM. The final prompt I ended up with was:

        prompt = (
          f"You are a trained, expert tax preparer.\n\n"
          f"TAX REFERENCE MATERIAL:\n{context_str}\n"
          f"─────────────────────────────────────────\n\n"
          f"QUESTION: {question}\n\n"
          f"INSTRUCTIONS: Before answering, read ALL chunks in the reference material above. "
          f"Identify every chunk that is relevant to the question. "
          f"If a chunk is titled or discusses a rule that directly matches the taxpayer's situation, "
          f"that chunk must be cited and applied. "
          f"Do not ignore chunks simply because they do not mention the taxpayer's filing status. "
          f"A rule that applies to 'taxpayers' applies to ALL taxpayers unless the chunk explicitly "
          f"states otherwise.\n\n"
          f"ANSWER: If taxpayer facts are provided, treat them as completely accurate. "
          f"Apply tax rules as they are written — if the taxpayer meets the stated qualifications "
          f"for a rule, the rule applies. Do NOT require the reference material to explicitly "
          f"confirm every combination of circumstances. "
          f"Only answer False or state a rule does not apply if the taxpayer facts fail to meet or "
          f"violate a stated qualification. "
          f"IMPORTANT: If the reference material contains a general rule that applies "
          f"to all taxpayers, that rule takes precedence over more specific rules that "
          f"apply to a subset of taxpayers, unless the specific rule explicitly excludes "
          f"the taxpayer's situation. "
          f"Consider ALL tax rules that may apply to the taxpayer's specific circumstances "
          f"including filing status, age, disability, and dependents. "
          f"Use the reference material to support your answer and cite specific references used.\n\n"
      )

For the web interface, as I mentioned above, I used Gradio. This provides an interactive web page and web server. For this application, in addition to the input query and response, there is a box to enter factual information about the question (the simple scenarios are a good example) AND a box that allows the user to upload Markdown files to be handled the same way (which is what was done for the complex scenarios with tables and documents such as receipts).  This is the Gradio section of the code. You can see how little is needed to produce an interactive web page complete with file upload capability.    theme = gr.themes.Default(text_size=gr.themes.sizes.text_lg)

    with gr.Blocks() as demo:
      # ── State: holds the current scenario document text ──────────────────
      # gr.State is invisible to the user; it just keeps a Python value
      # alive between interactions for this browser session.
      doc_state = gr.State("")   # starts as empty string = no scenario loaded
      gr.HTML("<h1> Tax ChatBot</h1>")
      gr.Markdown(
          "Ask questions about federal income taxes and get answers.  \n"
          "The bot is a demonstration and can make mistakes or not know certain information. Always "
          "double-check with an autoritative source or a human tax professional before making any decisions based on the bot's answers.  \n\n"
          "**Commands:** Type `/clear` to reset memory | Type `/quit` for exit instructions"
      )
      # ── File upload row ───────────────────────────────────────────────────
      with gr.Row():
          file_upload = gr.File(
              file_types=[".md"],
              label=" Upload Scenario (.md)",
              scale=2,
          )
          doc_status = gr.Textbox(
              label="Current Scenario",
              value="No scenario loaded — answering from taxpayer facts and reference material only.",
              interactive=False,
              scale=3,
          )
      # ── Chat area ─────────────────────────────────────────────────────────
      chatbot = gr.Chatbot(height=500)
      with gr.Row():
          notes = gr.Textbox(
              label="Interview Notes / Taxpayer Facts",
              placeholder="Paste or type taxpayer facts here...",
              lines=4,
              scale=5,            
          )
          msg = gr.Textbox(
              placeholder="Ask your tax question here… (Enter for new line, Shift+Enter to submit",
              lines=4,
              show_label="Question",
              scale=5,
          )
          submit_btn = gr.Button("Send", scale=1, variant="primary")
      # ── Wire up upload ────────────────────────────────────────────────────
      # When a file is chosen:  read it → update doc_state, doc_status, chatbot
      file_upload.change(
          fn=upload_scenario,
          inputs=[file_upload],
          outputs=[doc_state, doc_status, chatbot],
      )
      # ── Wire up chat ──────────────────────────────────────────────────────
      # chat_function needs: the typed message, current history, and the State.
      # It returns: cleared textbox (""), updated history.
      submit_btn.click(
          fn=chat_function,
          inputs=[msg, chatbot, doc_state, notes],
          outputs=[msg, chatbot],
      )
      msg.submit(
          fn=chat_function,
          inputs=[msg, chatbot, doc_state, notes],
          outputs=[msg, chatbot],
      )
  print("\n" + "=" * 60)
  print("Launching Gradio interface...")
  print("=" * 60 + "\n")
  demo.launch(
      server_name="127.0.0.1",
      server_port=7861,
      share=False,
      inbrowser=True,
      theme=theme,
      auth=[
          ("UserID", "Password"),
      ],
      auth_message="Tax ChatBot — Please log in to continue.",
  )

Although the chatbot runs locally on my home PC, I wanted it to be accessible from other devices on the internet. To do that, I used the free Cloudflared service. The only cost was registering a domain name so that I could have the bot associated with a fixed, permanent URL. You can also do totally free testing with changing URL’s provided by Cloudflare. This service sets up a secure outbound-only connection between your local server (or container) and the Cloudflare network using a lightweight daemon named cloudflared. It eliminates the need for open firewall ports, port forwarding, or public IP addresses. This is shown in the figure. Discussion of setting up and using cloudflared is beyond the scope of this write-up.

Left shows a server on the local network. It has a right arrow to the Cloudflare tunnel to create and connect the tunnel, and a left arrow receiving proxy requests. The Cloudflare Tunnel service in the middle has text: "Maps incoming requests, e.g., to www.taxbot.com, to the tunnel established by the local server." to the right are users connected to the service via the web.

Relationship between local server, the Cloudflare Tunnel service, and Users on the Internet

By setting it up this way, any time I start the taxbot, it is accessible to anyone on the internet with the right user ID and password. The user ID and password check is handled by the gradio code. This isn’t high-level security, but combined with cloudflared, it’s adequate for my purposes.

Use of AI in Development

I used Claude (not Claude Code) extensively in developing the chatbot itself, as well as adding Gradio to provide the tool as a web service and to show me how to use Cloudflared to safely make the tool available over the internet. For the chatbot, I went over every suggestion and made sure that I understood the code thoroughly, as one of the main points of the project was to learn more about implementing RAG models in practice. For the Gradio and Cloudflared portions of the work, I was less concerned with making sure that I understood every detail.

Using Claude drastically lowered the learning curve and allowed me to implement the system much more quickly and efficiently. But it was not without its problems. For example, I wanted to keep displaying the query while the tool was processing, but Gradio temporarily removes it. Claude told me a simple fix to pass the query to the display processing. However, this didn’t change anything, and when asked why in a follow up, Claude informed me that while the change it had told me to make provided the information to the correct routine in Gradio, Gradio is programmed to always clear the query box anyway, and that it would be very complicated to try to change that behavior. There were also several other examples where I had to go back and question a suggested change that Claude recommended or inquire about something that didn’t seem to make sense, and have Claude only then decide that I was right and revise its recommendations.

Results & Conclusions

Not surprisingly, this home implementation was not able to pass the IRS tax preparer basic exam. It scored 63%, when a passing score requires 80%. One of the primary reasons for this is the small, limited LLM that I used due to running the tool on my home computer. Another reason is that being a hobby project, I conducted only limited tuning on the number of chunks returned and the instructional prompt. I’m confident that a professional system with a larger volume of authoritative training documents, a larger and more capable LLM, and more time spent with fine-tuning could pass the exam. I would love to have an opportunity to put that to the test, but all of the commercial tax expert bots I found either didn’t have a sufficient free trial or explicitly prohibited benchmarking in their licensing agreement.

In addition, being limited by my graphics card, it typically took a couple of minutes for the tax bot to answer each question.

Despite these limitations, I was impressed by how well it handled some questions, and how it could both describe its reasoning and present the source documents that it used to reach its answers. Here are some examples:

Example 1: Uber Driver

Query: Part of my income comes as a self-employed Uber driver. Can I take mileage as a business deduction, and if so, how much per mile?

Response: Based on the provided reference material, I will address the question step by step.

Relevant Chunks:

  1. Chunk 2: Car and truck expenses
  2. Chunk 5: Car and truck expenses (identical to Chunk 2)
  3. Chunk 4: Income > Schedule C; or Keyword: SC or BUS
  4. Chunk 6: D-30 to Front Cover, Schedule C – Questions About Your Business

Analysis:

As a self-employed Uber driver, the taxpayer is eligible for business deductions related to their driving activities.

  1. According to Chunk 2 and Chunk 5, vehicle expenses can be calculated using actual expenses or the standard mileage rate. The standard mileage deduction includes depreciation, lease payments, maintenance, repairs, gasoline (including gasoline taxes), oil, insurance, and vehicle registration fees.
  2. Since the taxpayer is a self-employed individual reporting income on Schedule C, they are eligible to use the standard mileage rate for business miles driven as an Uber driver. This is supported by Chunk 4, which states that businesses with inventory, employees, contract labor, depreciation, individual asset purchases exceeding $2,500, business use of the home, and expenses over $50,000 or a net loss are Out of Scope.
  3. The standard mileage rate for 2025 is 70 cents per mile (Chunk 2 and Chunk 5).
  4. Commuting miles, parking tickets, traffic fines, or penalties are not deductible (Chunk 2 and Chunk 5).

Conclusion:

As a self-employed Uber driver, the taxpayer can take mileage as a business deduction using the standard mileage rate of 70 cents per mile for business miles driven.

Cited References:

  • Chunk 2: Car and truck expenses
  • Chunk 5: Car and truck expenses
  • Chunk 4: Income > Schedule C; or Keyword: SC or BUS

───────────────────────────────
Sources:

[1] NTTC 4491 TY25 Rel 2.pdf (relevance: 0.017)
## Exercises (continued) Question 4: David, a full-time college student who lives at home, also drives part-time three days a week after school as an independent contractor for Uber. He uses…

[2] NTTC 4012 TY25 Rel 1b.pdf (relevance: 0.016)
## Income>Schedule C; or Keyword: SC or BUS Businesses with inventory, employees, contract labor, depreciation, individual asset purchases exceeding $2,500, business use of the home, expenses over $…

[This response took 110 seconds. The “out of scope” text indicates that those items are beyond the scope of tax returns that the volunteer tax preparers are authorized to handle.]

Example 2: Claiming a Dependent

Query: My daughter is 35 years old and a full time student. She doesn’t live with me, but I pay over half of her living expenses. Can I claim her as a dependent?

Response: Based on the provided reference material, I will address the question:

“My daughter is 35 years old and a full-time student. She doesn’t live with me, but I pay over half of her living expenses. Can I claim her as a dependent?”

Relevant chunks:

  • Chunk 1: Rules for a qualifying child of divorced or separated parents
  • Chunk 3: Who is a qualifying person?
  • Chunk 4: Exercises (continued)

Analysis:

According to Chunk 3, “A qualifying child who was under the age of 13 when the expenses were incurred and who can be claimed as a dependent.” However, this rule does not apply because the daughter is over 13 years old.

The next relevant rule is from Chunk 1: “In the case of divorced or separated parents, the custodial parent (with whom the child lived for more than half the year) can qualify for the EIC regardless of whether or not they claim the child as a dependent.” However, this rule does not apply because the daughter lives with her mother only temporarily and not for more than half the year.

The final relevant rule is from Chunk 3: “Any person who was incapable of self-care whom the taxpayer can claim as a dependent or could’ve been claimed as a dependent except that the person had gross income of more than $5,200 or filed a joint return or that the taxpayer or spouse, if married filing jointly, could be claimed as a dependent on someone else’s 2025 return.” However, this rule does not apply because the daughter is not incapable of self-care.

The last relevant rule is from Chunk 4: Exercises (continued), Question 3. According to this question, “Maureen’s 20-year-old daughter, Angie, lived with her for eight months of the year. Angie is not married and is a full-time college student. Is Angie a qualifying child for the EIC?” The answer is no because Angie did not live with Maureen for more than half the year.

However, in our case, the mother pays over half of her daughter’s living expenses, but the daughter does not live with her for more than half the year. According to Chunk 3: “The qualifying person must live with the taxpayer more than 1/2 the year.” Therefore, the rule that applies is from Chunk 4: Exercises (continued), Question 3.

Answer:

No, you cannot claim your daughter as a dependent because she does not meet the requirement of living with you for more than half the year.

───────────────────────────────
Sources:

[1] NTTC 4491 TY25 Rel 2.pdf (relevance: 0.017)
## Rules for a qualifying child of divorced or separated parents The child cannot be claimed as the qualifying child for EIC purposes by more than one taxpayer. In the case of divorced or separa…

[2] NTTC 4012 TY25 Rel 1b.pdf (relevance: 0.016)
## Who is a qualifying person? – A qualifying child who was under the age of 13 when the expenses were incurred and who can be claimed as a dependent. However, see the caution below. Only the …

[This response took 90 seconds. NOTE THAT THIS ANSWER IS WRONG!!! A qualifying relative does not have to live with you all year, provided that they make less than a certain maximum income. A daughter is a qualifying relative. Apparently, the taxbot focused on the reference material that specifically referred to children and did not pull chunks dealing with “qualifying relatives” even though a daughter is a qualifying relative. If a query specifically states that the person is a qualifying relative, then the taxbot gets the correct answer, but in that case, the questioner will probably already know the answer.]

Example 3: Home Office Deduction

Query: I’m self-employed and use part of my home as a home office. Can I claim a deduction for that, and how does that work?

Response: Based on the provided reference material, I will address the question about claiming a home office deduction as a self-employed individual who uses part of their home for business purposes.

Relevant chunks:

  • Chunk 4: Other terms to know (specifically, the definition of “Home office”)
  • Chunk 4: Self-employment tax: (mentioning that the software will automatically calculate the required tax and the adjustment to income for the portion of the tax that is deductible)
  • Chunk 4: Net earnings from self-employment: (mentioning that net earnings represent “compensation” for IRA contribution and deduction purposes)

According to Chunk 4, a home office deduction may be claimed if the part of the home used for business meets one or more of the following conditions:

  • Exclusively and regularly as the taxpayer’s principal place of business;
  • Exclusively and regularly as a place where the taxpayer meets or deals with patients, clients, or customers in the normal course of a trade or business;
  • In the case of a separate structure that is not attached to the home, in connection with the trade or business;
  • On a regular basis for certain storage use;
  • For rental; or
  • As a daycare facility.

Since the taxpayer uses part of their home as a home office, they may be eligible for this deduction. However, it’s essential to note that the home office deduction “may be limited and is always out of scope” (Chunk 4).

Regarding the calculation of the home office deduction, the reference material does not provide specific guidance on how to calculate it. However, it mentions that the software will automatically calculate the required tax and the adjustment to income for the portion of the self-employment tax that is deductible (Chunk 4: Self-employment tax:).

To determine if the taxpayer can claim a home office deduction, I would need more information about their specific situation, such as how they use their home office and whether it meets one or more of the conditions listed above.

However, based on the provided reference material, I can conclude that:

  • The taxpayer may be eligible for a home office deduction if they meet one or more of the conditions listed in Chunk 4.
  • The software will automatically calculate the required tax and the adjustment to income for the portion of the self-employment tax that is deductible (Chunk 4: Self-employment tax:).
  • Net earnings from self-employment represent “compensation” for IRA contribution and deduction purposes, which may be relevant if the taxpayer wants to claim an IRA deduction (Chunk 4: Net earnings from self-employment:).

───────────────────────────────
Sources:

[1] NTTC 4491 TY25 Rel 2.pdf (relevance: 0.017)
## Self-employment tax Self-employed taxpayers can deduct a portion of their self-employment tax from their income. Self-employment Tax is covered in the Lesson 27 – Other Taxes. The self-empl…

[This response took 102 seconds. Again, the reference to “out of scope” is because, as noted in the reference material, the volunteer tax preparers aren’t authorized to prepare returns that include home office expenses. The IRS sets up rules every year for what is “in scope” and “out of scope” for these volunteers.]

Code

The full code for the taxbot is available for reference on GitHub at github.com/ViennaMike/Taxbot/ You will need to replace the placeholders for UserID and password in the code. The code will also accept a list of UserID, password tuples. You would also need to download the two volunteer tax guides from the internet and go through the pre-processing steps described above to chunk the documents and put them in a vector store database. The two documents are also available on GitHub as pdf documents.