
Introduction
We have a set of plywood bear silhouettes set up in our backyard for most of the year, visible from our house and from the street through the woods. This year, I decided to make a Halloween scene to replace them when they first go into hibernation for the fall and winter. The bears would be replaced with a witch and her cauldron, and there would be artificial lit coals under the cauldron.
The Silhouettes
To make the silhouettes, I first needed a pattern. I borrowed a nice outline for the witch

Scale drawings of the witch and cauldron
that I found online, modifying it so that it would be easily recognizable, interesting, but within my personal jigsaw skills ability. The cauldron I just drew from scratch. I made scale drawings, with vertical and horizontal scaling lines marking what would be every six inches in the final build.
The purpose of the scaling lines was to make it much, much easier to freehand layout the full-size pattern on the plywood. I went from where each line in the outline crossed a scaling line to the next scaling line, hand-drawing in each segment. Once the pattern was drawn on the plywood at scale, I cut both the witch and the cauldron out using a jigsaw.
I primed the silhouettes with flat black spray primer / paint and then painted them with flat black barn paint.
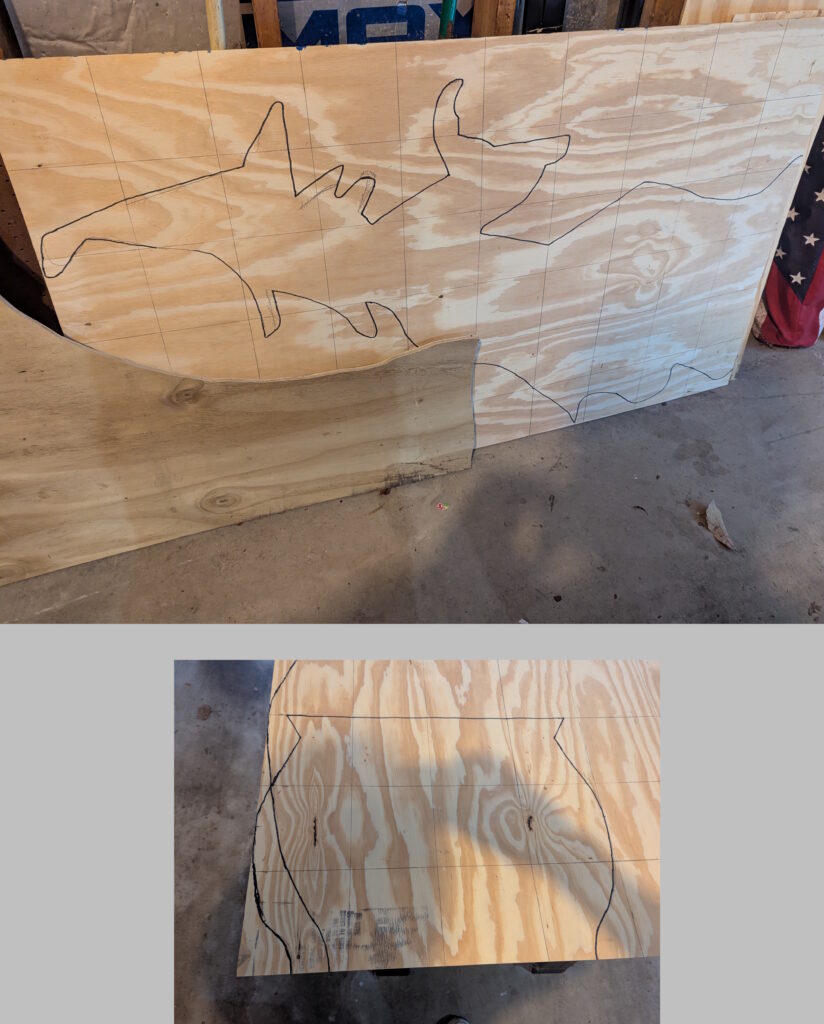
The outlines sketched onto the plywood, using the scaling lines.

The cutout witch, prior to priming and painting.
The Coals
There are many tutorials online for making realistic looking coals using spray foam crack filler, spray paint, and orange string lights. Some, like what I built, are quite simple, while others are more involved, adding real sticks and ashes to make it appear more realistic. Since mine was intended to be viewed from a distance, I decided that there was no need for the added complexity.

The fake coals, with the first of two layers of crack filling foam applied.
I cut a shape out of plywood with rounded short sides and straight longer sides, with a rectangular slot cut in the middle to fit the cauldron and support stakes. After painting it black, just as with the silhouettes, I cut a piece of scrap 2×4 to set over the slot, so that the crack filling foam wouldn’t expand into that area and block where the cauldron would go. I wrapped the 2×4 piece in a plastic garbage bag so that the foam wouldn’t stick to it. Next, I laid out the string of lights. I used a 100-light string of orange LED bulbs. You could probably get by with a 50-light string, but I liked having more lights. Some people use plastic cups or cut pieces of soda bottles to go around each light, but others don’t bother, and I didn’t. I figure there’s little heat coming from each bulb, so hopefully the string will last for years. I have heard of one person who used incandescent mini bulbs and a fire somehow started, so I’d stick to LED bulbs.
Once the lights are laid out around the platform, you just spray on the crack filler, keeping in mind that it will expand some. You want the lights partially or entirely covered to look more like hot coals. You can go a little light the first time, and then once the foam dries, add more where it’s needed.
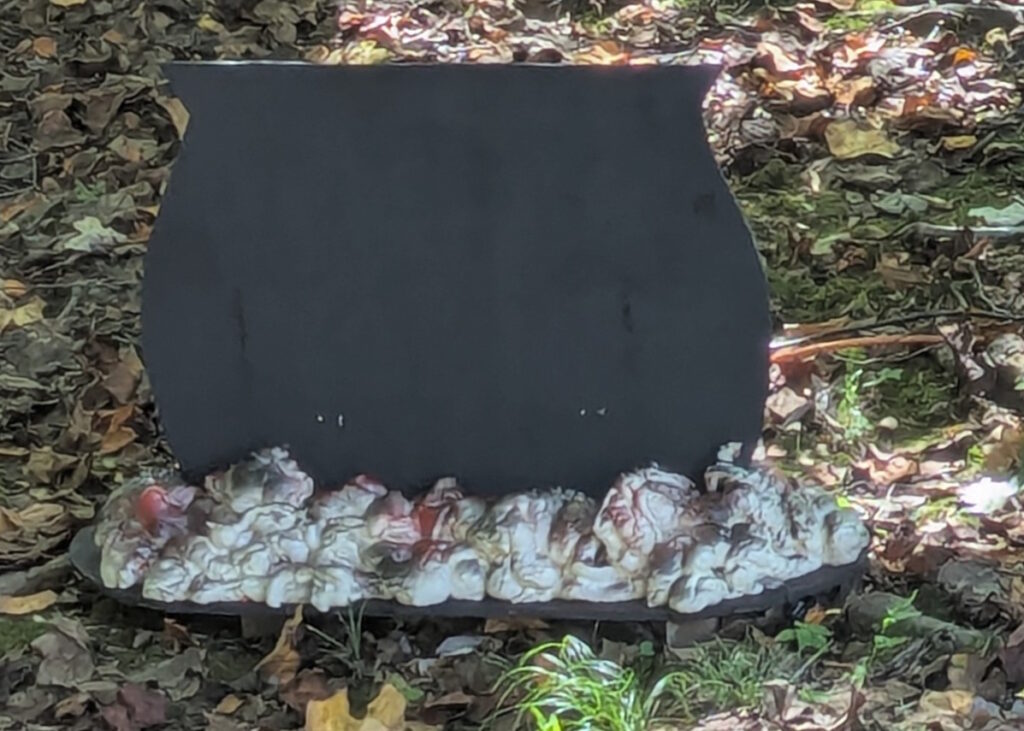
The finished cauldron and hot coals.
Next, I removed the 2×4 piece and used the same spray primer / paint to lightly go over the foam. The nice thing is you WANT the paint to be uneven, with some heavier, dark spots. Finally, I added some red spray paint highlights.
The last thing I needed was a spotlight to light up the silhouette at night. The coals show up clearly from the sidewalk and street, but the black silhouette is too dark without a light on it. I found a multi-color adjustable spotlight online that works great for this.
Final Results
The pictures here show the final result, from both sides in the daytime, and from the street at night, with the spotlight illuminating it.
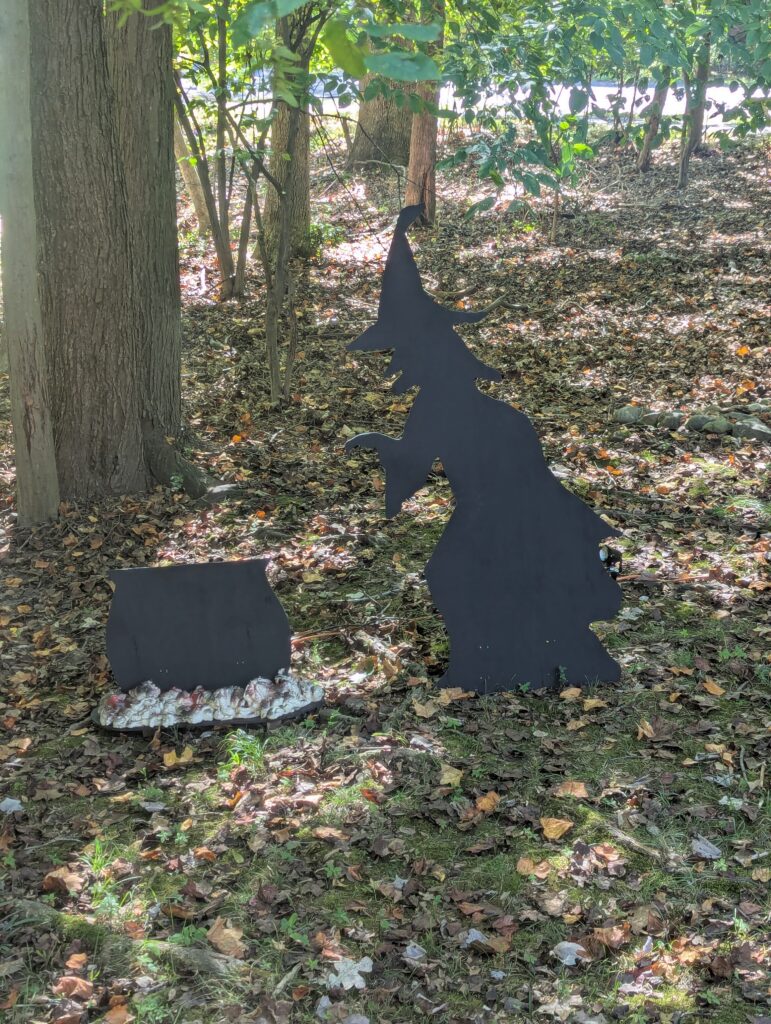
The installed project, viewed in the daytime from the back of our house.
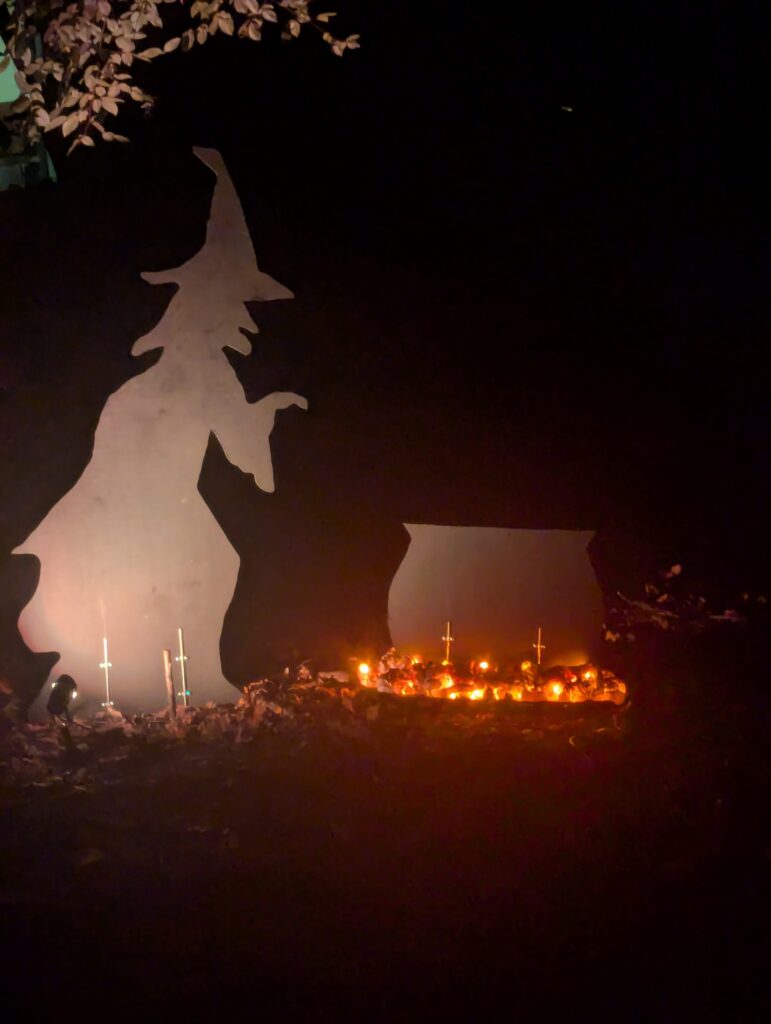
The final project at night, as viewed from the street. The spotlight illuminates the silhouettes.