An unseasonal post: Automating Halloween Props

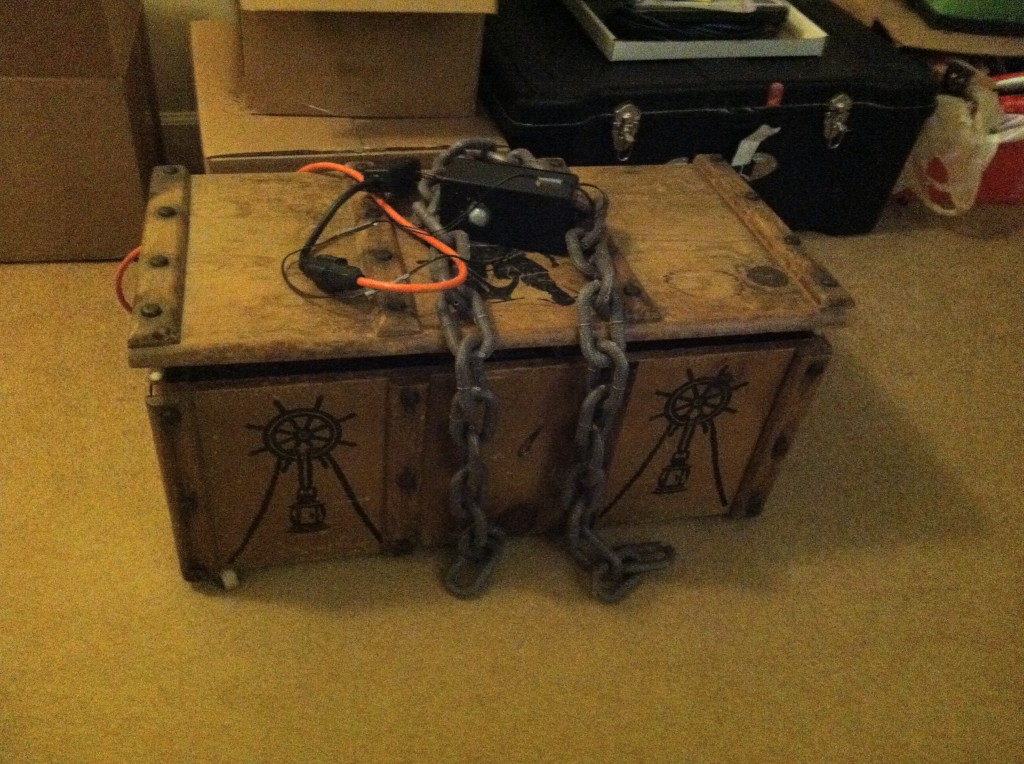
This post is more suited to Halloween then the coming Yule, but I finally got around to writing it, and besides, as I write this, there’s only 327 days left to next Halloween!  There are several options for controlling animated props, including prop controllers specifically designed for this purpose.  A recent addition to the market is the MonsterShield, an Arduino-based prop controller with open source code you can modify.  I haven’t tried one out, but thought it was work a mention.  In my props, I just use a handy micro-controllers, such as an Arduino, along with sensors such as a PIR.  The PIR (or pressure mat, or whatever sensor you choose) sends a signal to the microcontroller when it detects someone, and then your microcontroller can trigger a whole sequence of pre-programmed actions.  I had two such props in my Halloween display this year.  The first is a classic “Monster in a Box“.  I use a PIR sensor to detect when someone comes near.  When this happens,a Teensy sends out an output to a Power Switch Tail to turn on the power to a wall wart that delivers 12V power to the windshield wiper motor, as well as to a green light inside the box.  I use a Power Switch Tail so that I don’t have to worry about any safety issues dealing with house current directly.  The motor sequence has several stops and stop in it, of differing lengths, so that the action is more natural.  After it triggers, there’s a dead time, so that it doesn’t keep restarting while trick-or-treaters are standing in front watching it.

Closed Monster in a box, showing the box with the PIR and Arduino that triggers the box.

Inside view of the Monster in a Box, showing the wiper motor and irregular cam.


The other prop where I use a PIR and an Arduino is my scarecrow skeletons, who do a little talking and singing routine when triggered.  Here, an Arduino controls two Cowlacious audio boards that in turn drive the servo boards that control the jaw servo and lights in the skulls (also from Cowlacious).  I’ve had the audio boards for some time.  They work fine, and have a wide host of control options (including the ability to be triggered directly from a PIR).  However if I was remaking this prop, I’d probably just wire up some really cheap mp3 players. The video shows the two skeletons doing their routine. Sorry for the quality, my video editor is refusing to save the edited version.

There is Power in a Union: Dealing with multiple byte values via serial

One reads data from the serial port one byte at a time. This is fine for single by data types like char, but what if the data you’re receiving represents one or more multi-byte data types, such as floats or ints? How do you put the pieces back together again? There are several approaches, some for specific cases and other for more general cases. I came across the need to do this when dealing with a compass module. I’m sure there’s more than what I’ve stumbled across, so feel free to add more via comments.

One of the simplest cases is an int in two bytes. For this case, you can read the two bytes into a variable of type byte, then shift the higher value to the left by eight bits and add them into an unsigned int:

higherByte = compass.read();
lowerByte = compass.read();
bearing = ((higherByte<<8)+lowerByte)/10

In this example, bearing has been declared an integer, and the compass module returns a value between 0 and 3600. Since bearing is an int, which is two bytes long, each byte is converted to an int, the higher byte value is shifted left 8 bits, and the values added.

Another way of doing this is to take advantage of the Word data type, which for Arduino’s and other AVR devices (and on many other systems) is 16 bits. One can combine the two bytes into one word and then cast it as the appropriate type, e.g.,

x = (int) word(xHigh, xLow);

I put together some test code for the Devantech CMPS10 module’s bearing and raw data feeds using these two approaches.  If you’re curious or need a quick and simple test program for your compass, checkout https://github.com/ViennaMike/CMPS10SerialTest.

If the value being read uses less than the full 16 bits AND IS SIGNED, such as data from Parallax’s compass module, things get tricky. You need to read the highest bit used (which will be the sign bit) and see if it’s a 1 or a 0. If a 0, the number is positive, and you can just shift the data as above. If it’s negative, there is an additional step after you shift left. You need to have the new sign bit set to 1 and the unused highest order bits ALSO set to 1, since negative numbers are stored using twos complement arithmetic. So you want to bitwise OR the result with a mask, where the highest order bits in the mask, up to the number of unused bits in the original data, are set to 1, and the other bits to 0. See http://www.arduino.cc/playground/Main/HM55B for an example of this.

But what if you have more than two bytes in your structure, or you want to easily handle a long string where, perhaps, you read 6 bytes, with 2 bytes each for x, y, and z parameters? Then, my friends, you will learn that there is power in a “union.” A union is another data type. It allows the same portion of memory to be accessed as different data types. So you can define the particular union to be BOTH a sequence of bytes, read in sequentially over a serial port, perhaps, AND whatever the bytes represent (say a set of 3 ints, or 4 ints and 2 chars). Here’s a simple example:

union Data
{
byte b[2];
int value;
};

int main( )
{
union Data data;

data.b[0] = compass.read();
data.b[1] = compass.read();

bearing =data.value;

There’s more to union’s, and I recommend C-Unions and C++ Other Data Types for an introduction.  There’s also a direct serial port on arduino discussion at Float Value through Serial Port..

p.s.: The title of this post comes from the title of a song by labor activist Joe Hill, written in 1913. For a current version, check out Billy Bragg’s version on You Tube.

Compass Trials and Tribulations

I finally got back to working on my 1st robotic vehicle, and it’s been 1 step forward, two steps back, with one of the back steps being self-inflicted.  My first go at a robotic vehicle used only wheel encoders for dead reckoning, working alright for measuring distance traveled, but suffering the well known lack of both precision and accuracy in heading.  So for determining heading, I decided to add an electronic compass, in particular the Devantech CMPS10 tilt-compensated compass.  I don’t really need the tilt compensation, since I’m running over flat ground and flooring, but I figured I may want to reuse the compass later on another project and it’s inexpensive for a tilt-compensated compass.

So, I add the compass and run a simple test program.  First issue is that there’s clearly interference from the metal, motors, and/or electronics.  So I’ve mounted in on an aluminum mast, and that seems to clear things up.  One problem down.

Next I modified my code and went into a several hour debugging nightmare.  As is often the case, the bug is obvious in hindsight, with the symptoms pointing to it.  My robot ran forward the set distance, then, when it should have turned left, it spun right in endless circles, bringing to mind the Tommy Roe song Dizzy for those of us of a certain age. In debugging, I notice that while the simple compass reading test program works fine, when I load the full robot code, the bearing jumps in large discrete increments of about 22 degrees.  Curious, obviously a clue, but I couldn’t figure out what it meant.  Only after a couple hours of staring at code and trying small incremental changes did I notice the problem. Where I should have typed: lowerByte = compass.read(), I had instead typed lowerByte – compass.read().  The higher precision result from the compass is sent in two bytes, and I was never actually setting the lowerByte value, resulting in the large discrete jumps.  One self-inflicted problem solved.

Why did the robot turn right instead of left? Either the code was erroneously jumping to the middle of the obstacle avoidance routine, where it try turning right to avoid obstacles, or something else.  This was relatively easy to isolate, as when the robot is hooked up to the PC with debugging serial.print statements on, it dumps its current state and parameters each time through the loop.  So I quickly saw it wasn’t a bad state change.  The problem was self-inflicted wound two: a sign error.   A clockwise turn is positive in the coordinate system, but it’s a negative turn in terms of compass bearing (e.g., turning right from heading 90 degrees to heading 0 degrees).  So, flip the sign and I’m in business.  An easy one.

Now it moves straight to the first waypoint, turns in the proper direction, but not to the correct heading.  There’s a lag in the compass reading that I need to account for.  At least that’s not a silly mistake, and I know the source of the problem.

Here’s a picture of my initial compass test (without the robot) , and then MARV-1 with the compass mounted on the mast:

Tilt Compensated Compass Test displaying bearing


MARV-1 robotic vehicle with electronic compass on mast