Multi-Function PyPortal Information Display

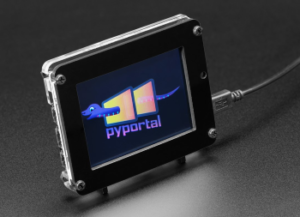
Pyportal front viewAdafruit’s Pyportal is a pretty powerful little device. One of it’s main functions are to grab and display data from internet APIs, but it can also easily log data to the cloud using Adafruit IO, has a couple built in sensors, and can be used to play games and perform other functions. Per Adafruit’s overview page, “the PyPortal uses an ATMEL (Microchip) ATSAMD51J20, and an Espressif ESP32 Wi-Fi coprocessor with TLS/SSL (secure web) support built-in. PyPortal has a 3.2″ 320 x 240 color TFT with resistive touch screen. PyPortal includes: speaker, light sensor, temperature sensor, NeoPixel, microSD card slot, 8MB flash, plug-in ports for I2C, and 2 analog/digital pins.”

It’s called the  Pyportal because it provides a portal (window) to information on the Internet and it’s programmed in CircuitPython, which is Adafruit’s fork of MicroPython and is an implementation of the Python programming language for microcontrollers.

There are a lot of examples of single-function applications available, such as weather, air quality, event count-down clock, and even how many astronauts are currently in space, along with their names. What I wanted to do was to have the device cycle through multiple applications. I ended up coding it to provide

  • The day, date, and time (inspired by how cruise ship’s change out a piece of carpet every day in the elevators to tell you what day of the week it is),
  • The current local weather,
  • The latest “shower thought” post from the shower thoughts subreddit, and
  • The current value and change from the previoius day for the S&P 500.

The project ended up to not be quite as easy as I thought it would be, but still pretty easy. I ended up restructuring a lot of the examples code to work better with scrolling through multiple functions, but the final result still borrows heavily from the examples previously posted online.

In this post, I won’t repeat the basics for getting up and running, which can be found online, but I will do a brief walkthrough of my code, which is posted on gitHub. To use it yourself, you’ll need to edit the “secrets.py” file to provide your WIFI login information as well as sign up with the API providers and put your personal keys or ID in that file. You will also want to provide the location id for your location for the local weather, rather than mine, in the main program.

Overview (code module)

The program consists of a main module that first takes care of initial setup, making the wifi connection, and initializing variables, for example, the location ID for the local weather and the URLs for the various data sources. Then it launches an infinite loop to go through and access and display the various types of data. In each case, there is a timer so that the URLs are not constantly being visited each loop.

For the weather and S&P 500 applications and initial background screen is loaded and briefly displayed. This changes to a different background depending on the current data. For Day / Date/ Time and for Shower Thoughts the appropriate background screen is initially loaded and remains the same while that app’s data is displayed.

For each application, the program checks to see if it’s time to get fresh data from the internet (which occurs the first time the app runs and on a fixed schedule after that. If it does, it updates the old raw data from the internet. If not, the old raw data is kept. Then the program calls an application-specific python module t that extracts the relevant data from the JSON, formats it, and returns a text_group object for display. text_group is part of the displayio library for CircuitPython. I encourage interested readers to read the linked guide to the displayio library, as it took me some time to figure out how all the pieces fit together.

The display is then updated by appending the text group to splash attribute of the previously created Pyportal instance. splash is a displayio Group that is automatically displayed on the screen. After a delay to allow the update to remain on the screen for the specified number of seconds the Pyportal splash.pop() method is called to remove the text_group that had been added. If this were not done, Pyportal.splash would just keep getting bigger and bigger as each app runs over and over through the endless main loop.

I could probably refactor the main loop to make some things more generic and then move them into a common function call, rather than having so much separate for each application.

Day / Date / Time (day_graphics module)

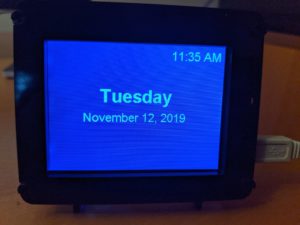
Day, date, and time display on the PyPortal

The PyPortal does not have an RTC, so while it has an internal clock function, it tends

to drift. However Adafruit provides their own time service to call and update the local time. This function is called once per hour to update the local time.

The day_graphics module parses out the date and time information from time.localtime() to extract the day of the week, day of the month, the month, and the year. It puts this in the desired string formatting and specifies the font and location on the screen for each displayed element.

Weather (openweather_graphics module)

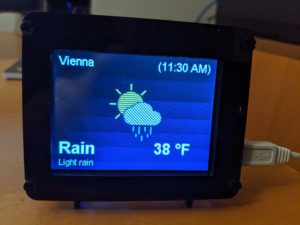
Current Weather Displayed on the PyPortal

For the weather, I chose to use openweathermap.org as the source for weather data and base my code on Adafruit’s PyPortal Weather Station example. That site has the local weather for my location and also has nice background icons for each weather type and whether it is daytime or nightime. There are several ways to specify the location you want the weather for, and various types of information available. This is all explained on their website. The example cited above used cityname and country, but that is ambiguous for my location, so I used their ID code for my location, which is unique.

The processing is very similar to the day/date/time app, although there is some additional work to convert temperature, which the API returns in degrees Kelvin, to Fahrenheit.

The icons are not downloaded using the API, but rather are stored on the PyPortal. The API returns the id number of the icon to be displayed. For this application, two items are returned from the function call: the text_group and the file name for the background image.

Shower Thoughts (st_graphics module)

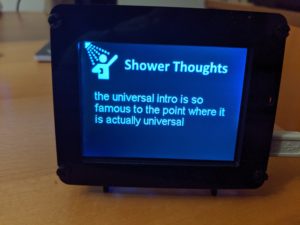
A “shower thought” displayed on the PyPortal

Shower Thoughts is a subreddit for “sharing those miniature epiphanies you have that highlight the oddities within the familiar.” Two recent examples are Taking notes in history class is rewriting history and You’d think the generation that grew up playing Oregon Trail would have more respect for some of these diseases. There is a JSON API to get these posts and I decided that it would be fun to have these cycle through.

The concept for this app is similar to the others, and in fact, only one field (the title) needs to be extracted from the JSON field (one of the rules of that subreddit is that the entire thought must fit in the title). However, the thoughts can still be rather long. If I used the small sized font, they generally appear rather small, but if I use the medium ones I have to truncate the thought n the middle. So the program checks the length, and uses the medium sized font if the message is short enough and otherwise uses the small sized font.

S&P 500 (market_graphics module)

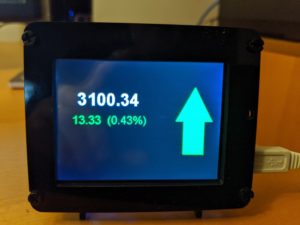
The S&P 500 value displayed on the PyPortal

The final application that this cycles through is getting the current value of the S&P 500 and comparing it to the previous day’s close. The data is obtained using a free API provided by Alpha Vantage.

Again, the processing is very similar. The customized features for this app is that the color of the amount and percent change is set as either green or red, depending on whether or not the index is up or down, and the background image is similarly selected to have either an upwards green arrow or a downwards red arrow.

Other Notes

The Pyportal is designed so that when something is written to it from a PC it does a soft reboot and starts running the main program. This is to make it really easy to do updates. The problem some folks have had, including myself, on a Windows 10 machine, is that it constantly does this soft reboot when plugged into either of my PCs. This doesn’t happen when it’s just plugged into a power source, then it runs fine. Apparently something keeps trying to write to it. As a work around, one can go into the REPL and type:

import supervisor
supervisor.disable_autoreload()

This turns off the auto-reload and soft reboot feature. Once that is done, one needs to stop a running program (type CTRL-C in the serial window) and then reload and restart by typing CTRL-D in the serial window. If anyone has a permanent fix for this problem, I’d love to hear it.

Sometimes the ESP32 board seems to have glitches, and an error condition is created and valid data is not returned. The try / except code in the main program just skips out of the application where that occurs and tries the next one. So far, this has caught and provided a work-around for all but one error, which popped up once after the application had been running for several days.

Summary

The PyPortal is a great little device that is capable of doing a lot (this example didn’t make use of the touchscreen features, built-in sensors, or i/o lines). Hopefully this example will be useful to others, especially if you want to have the PyPortal perform multiple functions, rather than only serving a single purpose at a time. Again, the code is available on gitHub.

Dynamic Toll Data: My First “Real” Alexa Skill

Summary

This project uses a combination of screen-scraping and an API to obtain current travel speeds and the current variable toll costs for Interstate 66 inside the beltway in northern Virginia, and provides the information to users via Amazon’s Alexa voice service. To try it out, first enable it (either just say “Enable sixty six tolls” or visit Sixty Six Tolls in the Amazon skills store). From then on, just say “Open sixty six tolls.”

Resources

The project uses Alexa’s voice service. The code is written in Python 3, using the Alexa Skills Kit SDK for Python. The code runs on AWS’ lambda service. It also makes (minimal) use of DynamoDB to store user-specific information. Travel times are scraped from the Virginia DOT’s (VDOT’s) 511 Virginia Traffic Information website. The real-time toll prices are obtained via an API to VDOT’s SmarterRoads data portal. Web scraping and XML parsing was done using Python’s Beautiful Soup library.

The python code as well as the interaction model (a JSON file) are available at https://github.com/ViennaMike/I-66-Tolls

Background

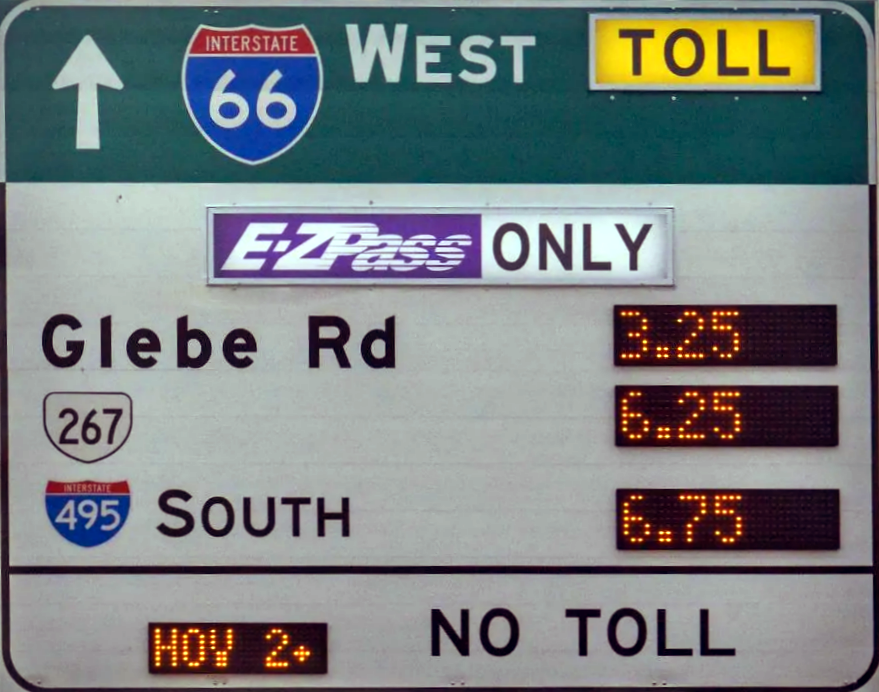
I was looking for a project that would use one of the data sets on the SmarterRoads portal, and I decided that it would be useful to be able to check the dynamic tolls on Interstate 66 inside the Beltway in Northern Virginia. Inbound traffic is tolled between 5:30 and 9:30 am, while outbound traffic is tolled between 3:00 and 7:00 pm.

The tolls are dynamically adjusted to maintain high speeds. While the toll may change between checking the cost at home and the time a driver reaches their entrance, it’s still useful to have an idea of the highly variable toll, especially since tolls for the entire 10 mile length have sometimes spiked at over $40. 

I had previously written a simple quiz skill using Amazon’s template, but this was my first custom skill.

Description

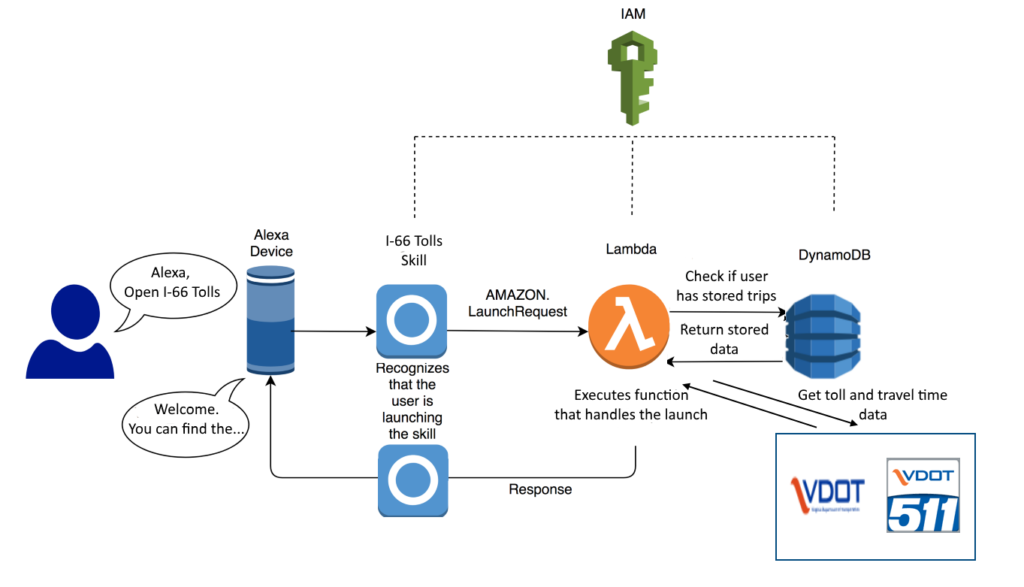
The overall architecture for the Alexa skill is shown below:

High Level Architecture

When a user interacts with the skill, the input is processed according to the interaction model that the developer defines in the Alexa Skill builder. This is captured in a JSON file. The skill builder is also where you tell the skill where to find the execution code for handling requests and ready a skill for certification and distribution.

In the case of 66 Tolls, there are eight custom intents, along with the Alexa built-in intents such as HelpIntent, FallbackIntent, StopIntent, etc. The custom intents are:

  • get_speeds for getting speeds and travel times for the two roughly parallel travel options (I-66 and US-50)
  • get_toll_hours to get static information on the hours that tolls are in effect
  • get_details to get additional static information about how the dynamic tolling system works
  • list_interchanges to get a list of inbound and outbound entrances and exits
  • get_toll to get the current toll price for a specified direction from a given entrance to exit
  • save_trip to save the user’s most frequent entrance and exit in each direction
  • get_favs to report back to the user what trips he has previously saved.
  • get_specific_help to provide help on particular types of requests (get toll, get speeds, and save trips).

When the skill is opened by a user who has previously saved a trip, the skill immediately returns the appropriate current inbound toll if it’s in the morning, or outbound toll if it’s in the evening or afternoon.

The Alexa Skills Kit SDK contains built-in functions to simplify interacting with Amazon’s DynamoDB NoSQL database. This skill uses a simple DynamoDB table to store the user_id (the key), most frequent inbound entrance and exit, and most frequent outbound entrance and exit.

By far the easiest part of the project was the code to get the travel times and tolls from the two VDOT sources. There is an API for the tolling data, and I had to do some simple web-scraping to get the travel time data. This code can be found in the get_travel_times() and get_tolls() functions in the code.

Developing the voice interaction model took multiple iterations, and I found that as time went on, I was able to improve the dialog model while reducing the number of intents and number of slot types associated with each intent. However, even then, I found that the first released version of my skill didn’t work for users the way I had intended. For the most part is worked well technically (there was one bad bug), but users other than myself said things differently than I had thought they would, and asked for help differently. It definitely pays off to not just spend time thinking of how users will interact with your skill (as I did at first), but in having others test out your skill as well, and getting there feedback.

Because this was new to me, it took considerable time, as well as trial and error, to figure out how to write the handler code, and especially how to handle the session and persistent attributes and the interaction with DynamoDB. I used a large number of resources, with the best being the Skill SDK documentation, the Color Picker sample app, and A Beginner’s Guide to the New AWS Python SDK for Alexa, by Ralu Bolovan. As described in the documentation, the python SDK supports two coding models, one based on functions with decorators, and the other based on classes. I chose to use classes, but the Color Picker example uses decorated functions.

Some of the hassles I had came from two factors: 1) the interface to Alexa skills has changed over time. It’s been improving, but this also meant that some of the samples and tutorials on the web are out of date. 2) While there is thorough documentation, a lot of tutorials and examples focus on simple demonstrations. For this reason, it may have been better for to step back and read more of the SDK rather than always jumping in. For example, I needed to have my code do something every time an intent was called, regardless of what the intent was. It turns out this is handled by Request Interceptors and Response Interceptors, which most of the simple samples leave out. This, along with the thorough walk-through on using DynamoDB, is why I found the Beginner’s Guide to the New AWS Python SDK for Alexa to be so helpful.

I originally wanted the invocation for the skill to be “i sixty six tolls,”, but I found that Alexa had trouble recognizing this as the invocation. For this reason, I had to make the invocation “sixty six tolls” rather than “i. sixty six tolls.”

I also found that if you use Alexa’s built in “confirm” capability, then when your code is called for the first time, the handler_input.request_envelope.session.new is set to False, apparently because the built-in confirmation request kicked off the session. That’s something to be careful of. For this and other reasons, I ended up checking whether or not I had previously initialized the session attributes, rather than whether or not the session was new.

The last technical bug I fixed was that I hadn’t thought about what “local time” was to the server. I have been naively thinking that since I was using AWS’s Northern Virginia server, the local time would be the US eastern time zone, but all Lambda servers use GMT as their local time, which makes a lot more sense. So I used the pytz library to convert to local time.

For the voice interface, I found I had to expand the list of synonyms for slot values (such as the names used for exits), add more specific help queries, besides the comprehensive, and therefore long, “help” intent, and make use of the interface’s built-in capabilities for checking user-provided slot values, which I hadn’t read about in the simple tutorials.

I hope that this example will prove helpful for others who want to write their own custom Alexa skills.

Calibration for 3-axis accelerometer and magnetometer

For my latest project, I’m using an 3-axis accelerometer / magnetometer, specifically Adafruit’s Triple-axis Accelerometer+Magnetometer (Compass) Board that uses the LSM303DLHC chip. .

The 3-Axis Magnetometer and Accelerometer Board

The 3-Axis Magnetometer and Accelerometer Board


My specific project may not require much precision, but I still decided it would be a good idea to calibrate the outputs. There are a number of  both sophisticated and simpler tools for magnetometer bias measurements, but I wanted a simple solution I could run on my headless Pi zero W and that dealt with calibrating both the magnetometer and accelerometer.  An excellent discussion that I borrowed heavily from is the blog post “How to Calibrate a Magnetometer.”

There are two general types of distortions in the outputs. One is a straight shift (bias) in a given direction, while the other distorts the response. The former is the easiest to deal with computationally. One can rotate the unit around all axes (a figure 8 movement with rotation is what I use) and measure the minimum and maximum values reported for the 3 axes (six values in all). If there is no bias, the absolute values for the + and – direction of each axis would be the same. If the response is shifted towards one or the other, there’s a bias present. One can simply compute the average of the min and max for each axis, and then subtract that value from the reported output for that axis.

plot showing an offset circle.

Offset bias. Called “hard iron distortion” in a magnetometer, as it is often due to the presence of exterior ferrous substances. (source: Vectornav)

The other type of error distorts the shape of the response. 3D matrix algebra is needed to fully address this type of error, but a simpler approach that provides an approximate correction is to just look at the 3 axes. Calculate the average delta between the maximum and minimums for each axis, then compute the scaling factor for each individual axis that scales the delta for that axis to match the average.

Plot showing rotated and offset ellipse

Plot showing both offset bias and non-linear response. The non-linear response is called “soft iron” bias in a magnetometer. (source: Vectornav)

My code then does the same thing for the accelerometer. For that calibration, you want to slowly (so as not to introduce large motion accelerations) position the board so that each of the 6 faces points up while the calibration program is running.

One that is done, the code then writes the magnetometer and accelerometer offsets and scaling factors for each axis (so 12 values in total) to a .ini file so that they can be called and used by the application program that will be making the measurements.

In my initial measurements, I found appreciable bias errors for the magnetometer (on the order of 12%), with much smaller bias errors for the accelerometer (on the order of 1.5%). The scaling factor corrections were  smaller for the magnetometer than the bias (the correction factors were 7.5%, 1%, and 6%). For the accelerometer, I measured 0.03%, 6%, and 5.5%).

The code is published at https://gist.github.com/ViennaMike/d8b8f9636694c7edf4f115b28c9378c0